 Aureole
Help center›Act in your apps
Attach the right context
When you open the bar with ⌥Space, it spots what you’re looking at in your app: selected text, an email, a web page, files. This content is called the source: it’s what the AI will read. This guide shows how to attach it to a question, add more, and what permission each source needs.
- An action always uses the source. A question uses it only if you attach it: click the dotted pill and it becomes solid.
- This choice only applies to the current question: after each send, the source goes back to being only offered.
- More windows can be added to a question; a file is found by its name, with the search on your Mac.
What the bar spots
When it opens, the bar looks at the app you were in. Depending on what you were doing there, the source is:
- in Mail, the text selected in the message, otherwise the open or selected message;
- in the Finder, the selected files: the pill then shows the file’s name, or how many there are;
- anywhere else, the selected text. If that text is a web address, the AI reads the page at that address;
- with nothing selected, in a browser, the whole web page;
- with nothing selected, in another app, the content of its window.
The pill, to the left of the field, shows the app’s name, followed by a small sign when the source is a text selection or an email. If you open the bar over Aureole’s own window, there is no source, so no pill.
Attach the source to a question
Here is the bar open over the message to Claire, selected in a Mail draft. The pill is dotted, with a “+”: the source is offered, but not attached yet. A question sent now would go on its own.
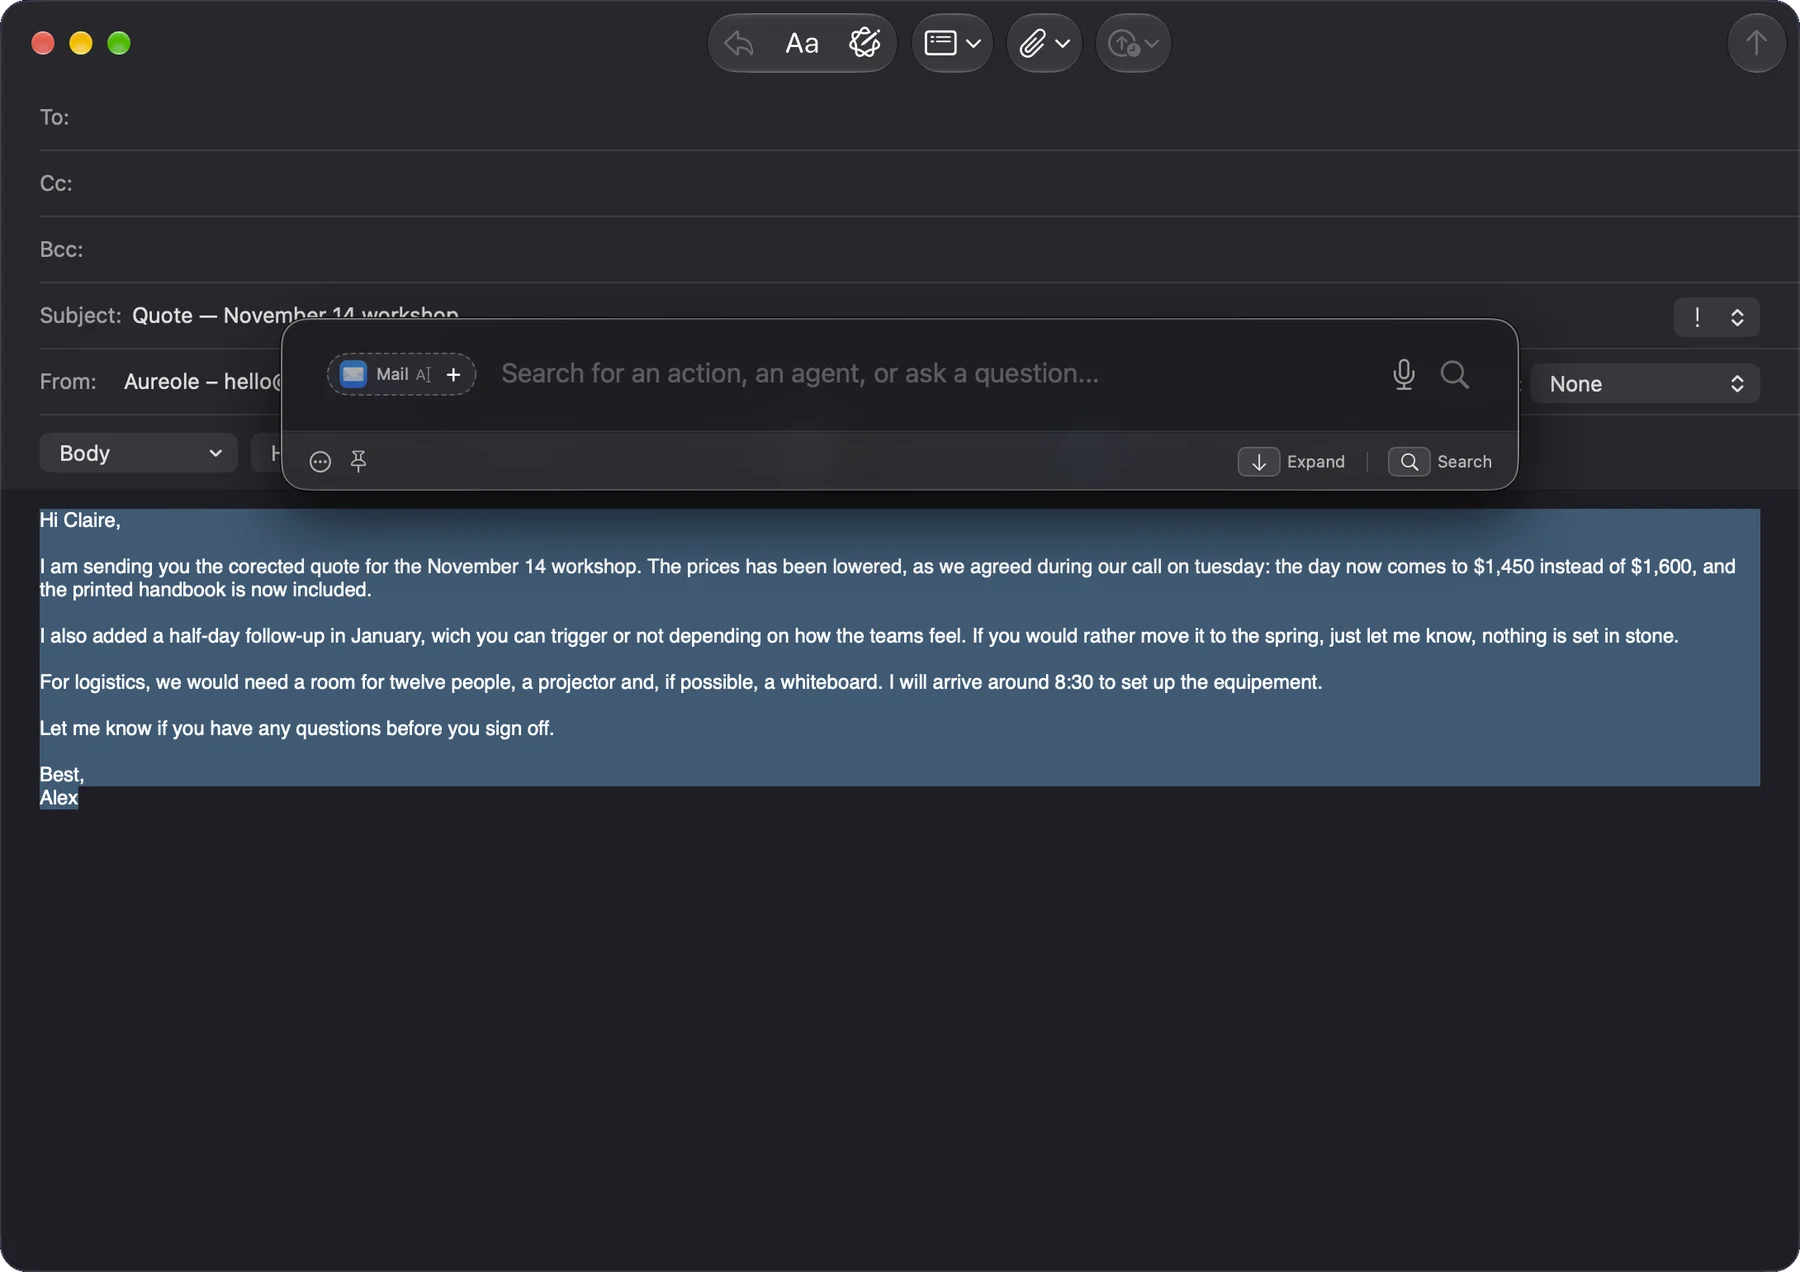
Click the pill, or its “+”: it becomes solid, and the source will go with your question.
A solid pill
Once attached, the pill is solid and shows an “×”. The message to Claire will go with the question typed in the field:
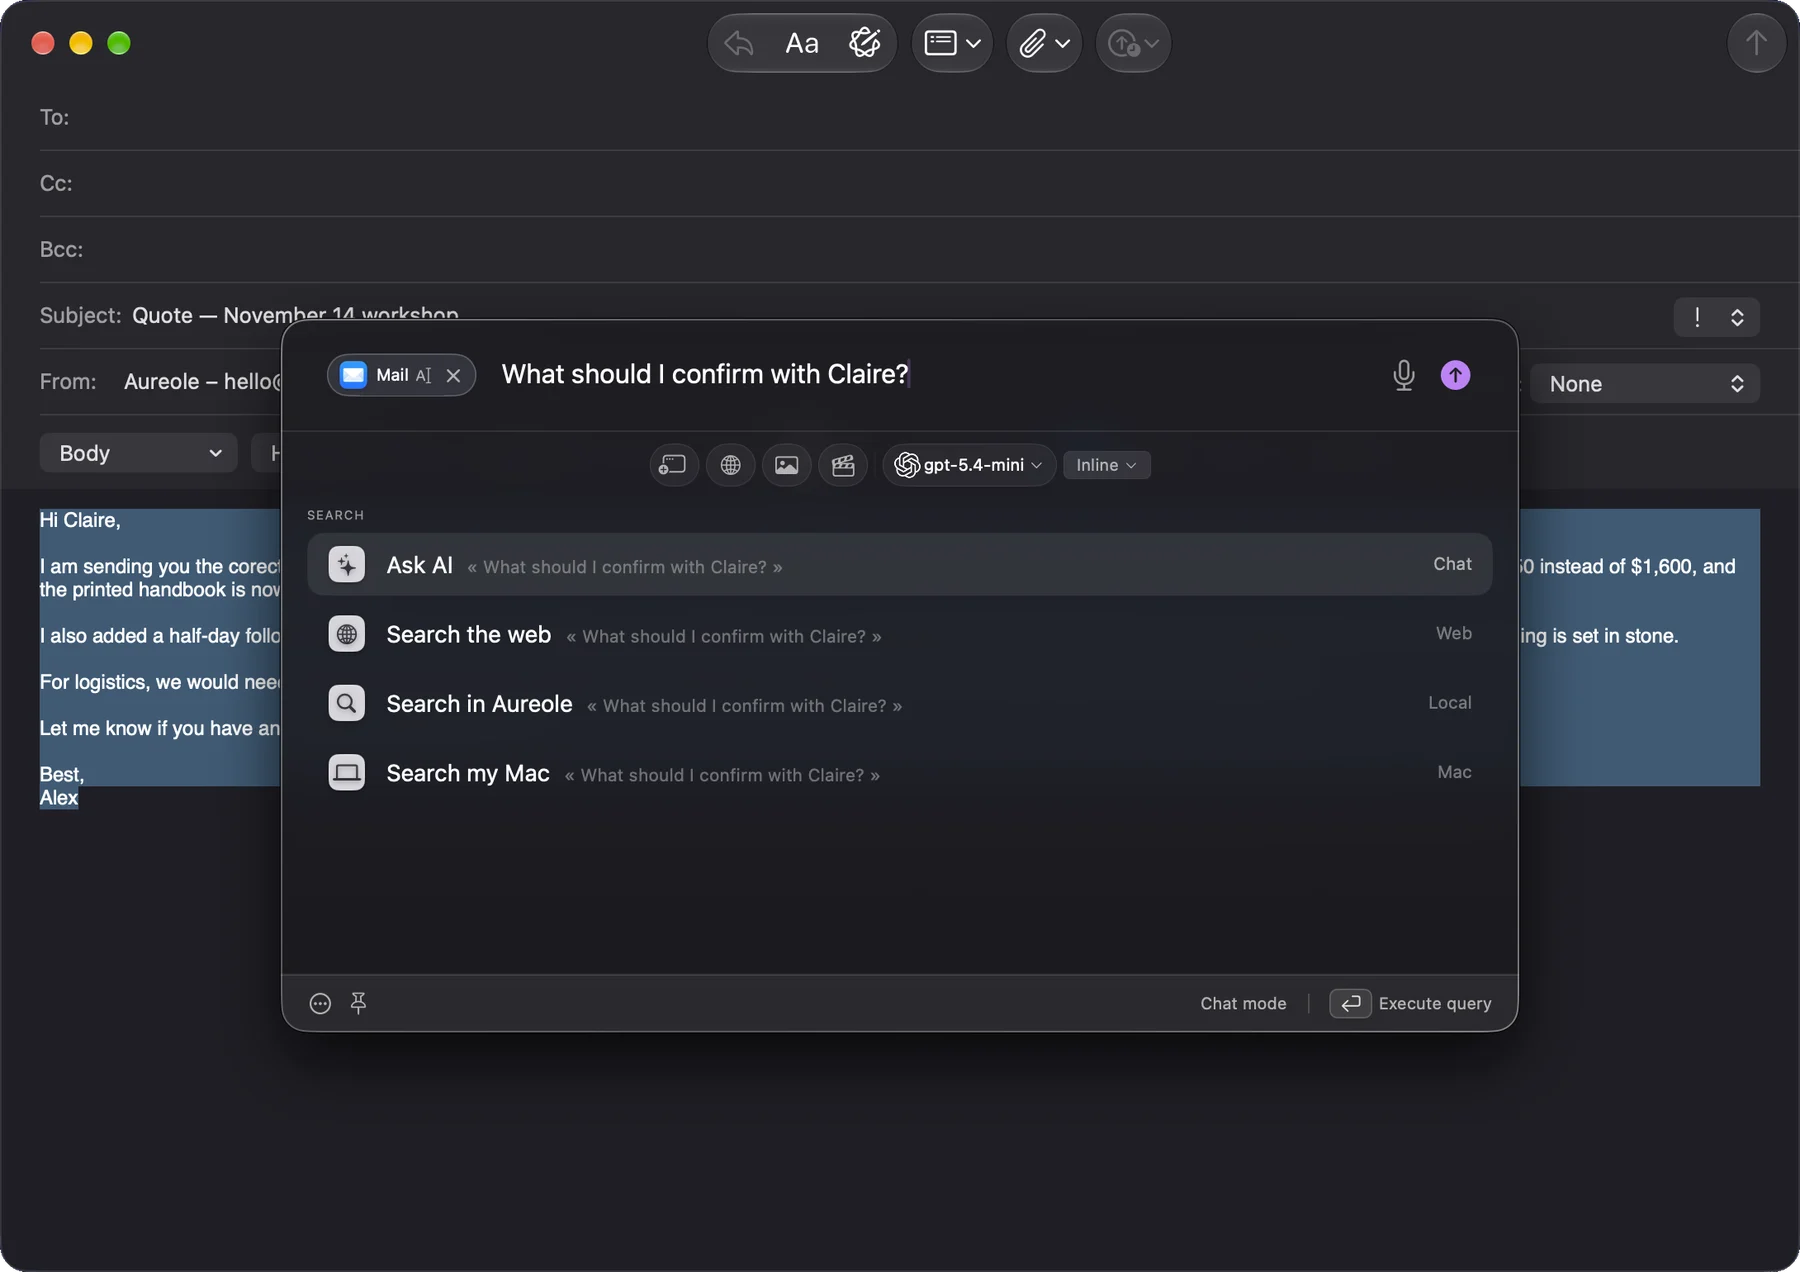
The “×” removes the source: the pill goes back to dotted, and any windows or files you added are removed with it.
This choice doesn’t last. After each send, and each time the bar opens, the source goes back to being only offered. To have it always attached, see “Its settings”, below.
An action, on the other hand, always uses the source, whether the pill is solid or dotted. That’s why, when an action is selected in the list, the pill shows solid, without an “×”.
When Return wouldn’t send a message (a web search, opening an app), the pill fades: the source isn’t used that time, but it stays attached for your next question.
See and remove sources
Click a solid pill, anywhere but its : the “Active sources” list opens. It shows each source, its app and its type, with a button to remove it .
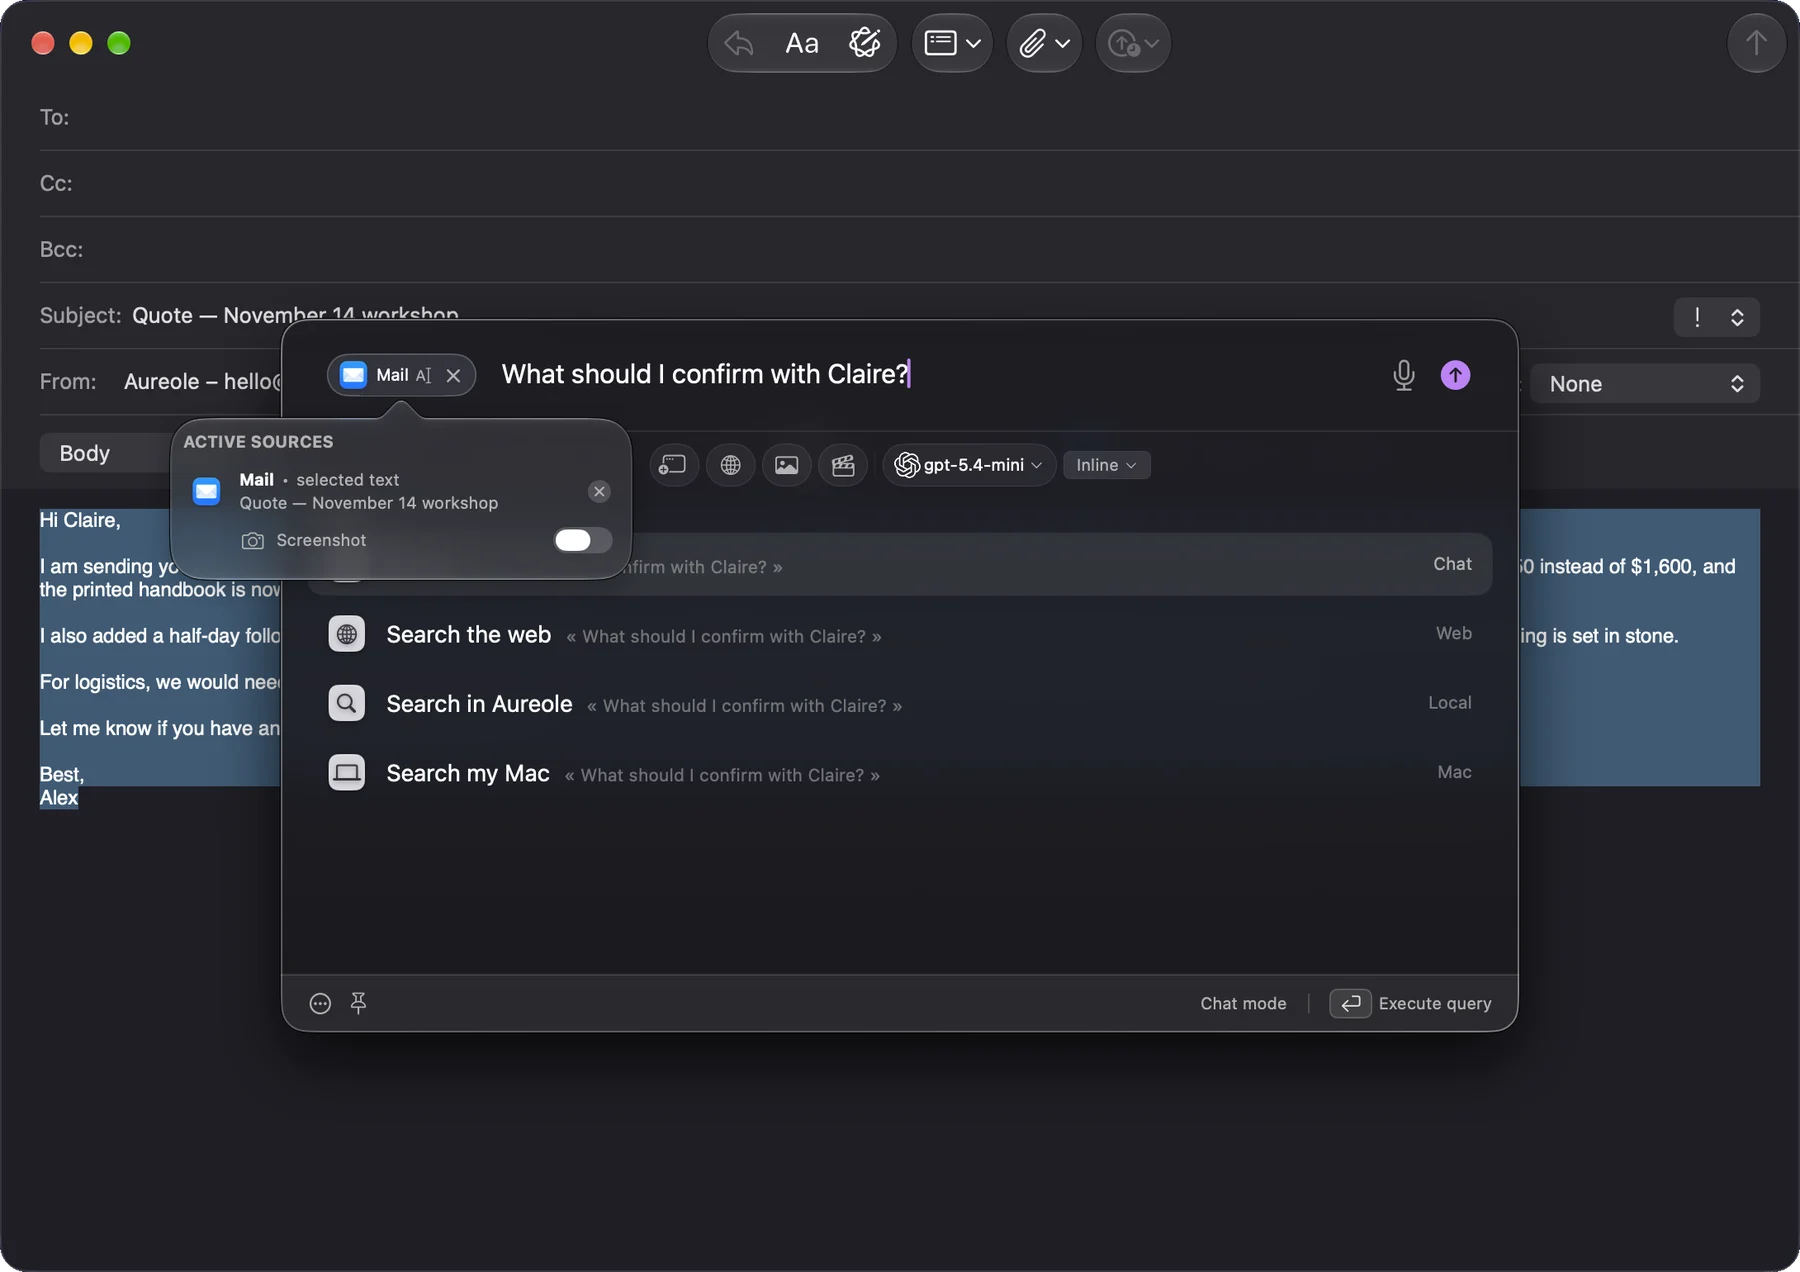
“Screenshot” also attaches an image of the window, so the AI can see what the text doesn’t say, such as a layout or a chart. This choice only applies to the next send. The image is attached only for a web page or a window’s content, never for a text selection, an email or files, and only if Aureole has the Screen Recording permission.
To attach this image by default, turn on “Window Screenshot” in Settings›Privacy.
Add more windows
A question can draw on several windows at once, for example a message and the quote it comes with. Type your question, then click, under the field, the button , a window with a “+” (“Add more sources”, on hover). The “Additional windows” list shows the windows of your other apps:
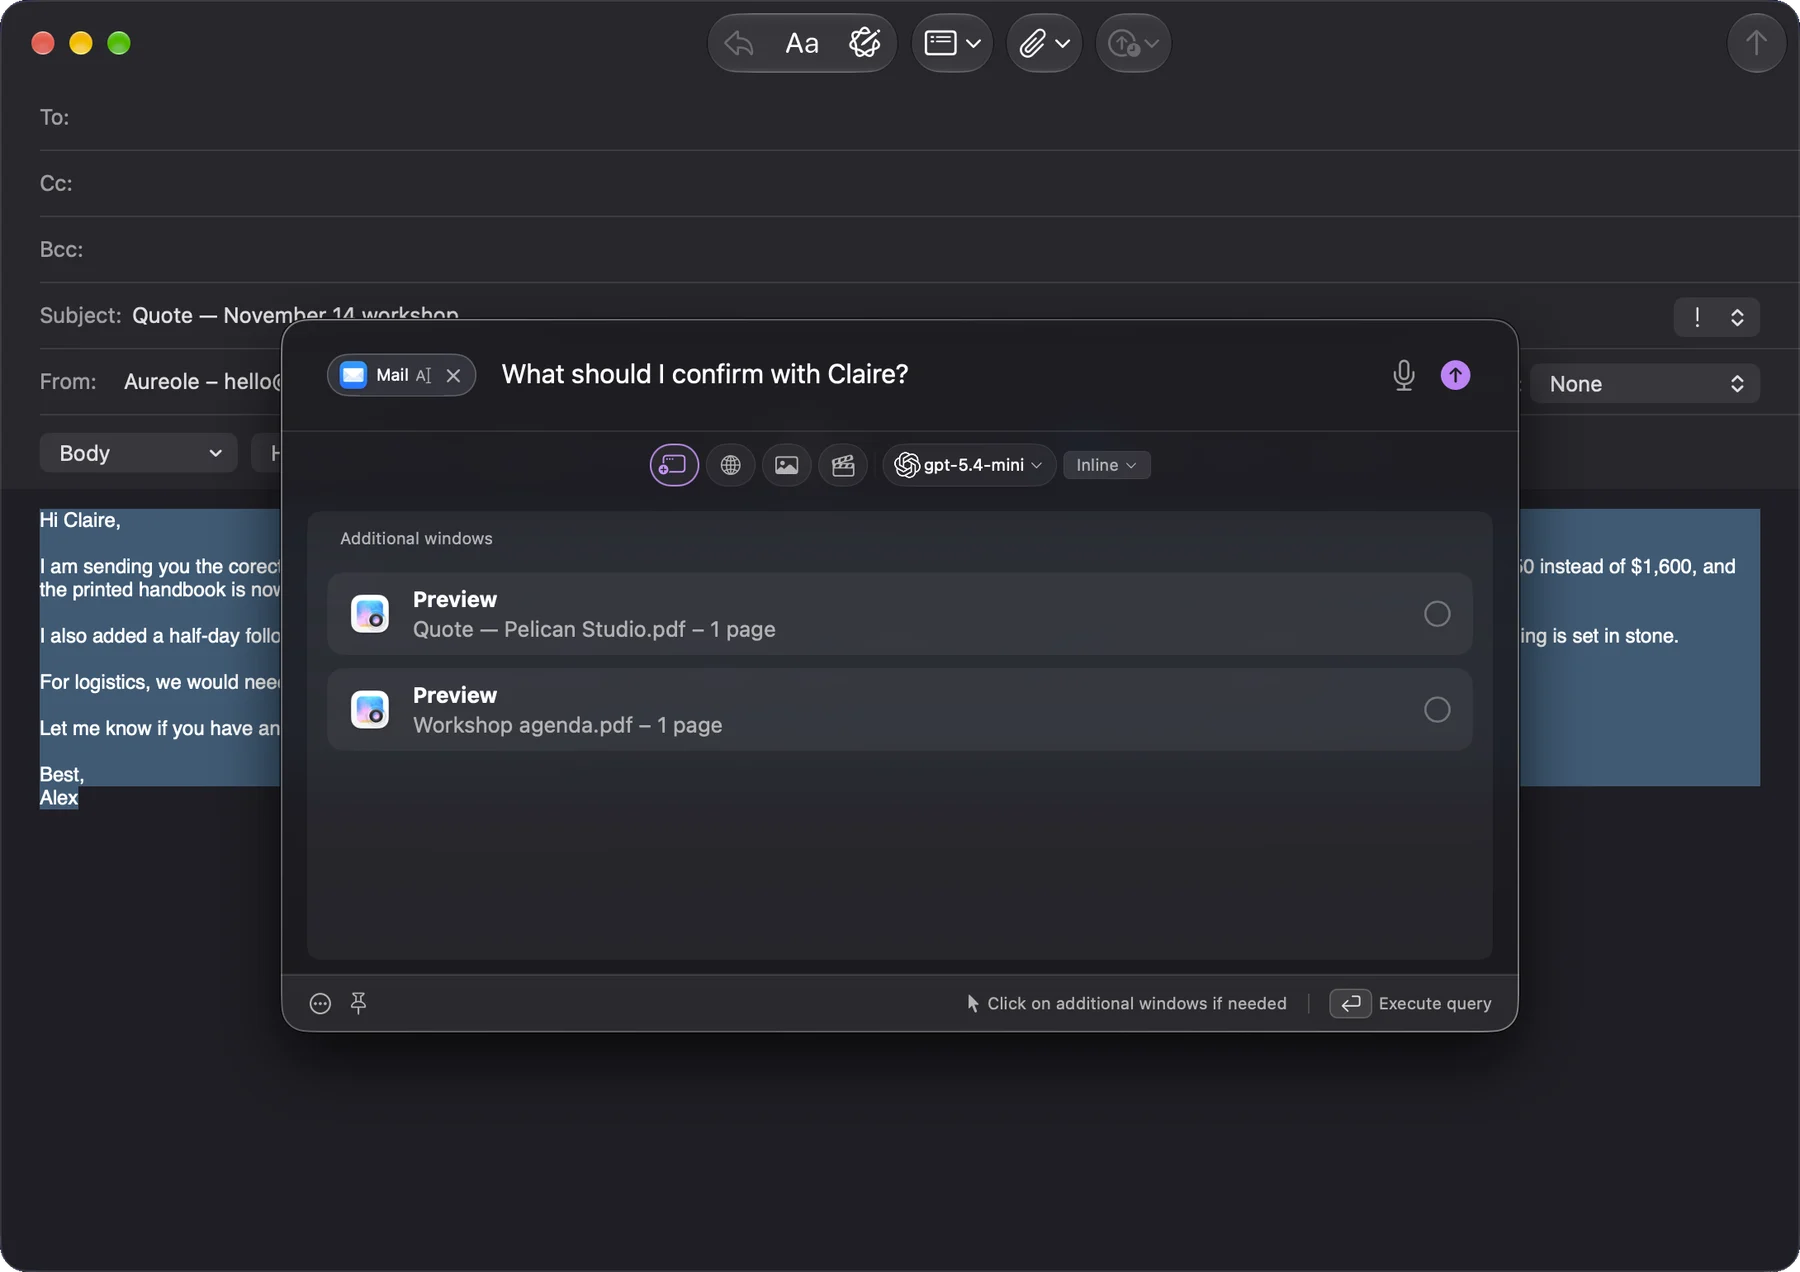
Click a window: Aureole reads its content (“Extracting...”, then “Extracted”) and adds it to the pill, which then shows the number of windows. These windows go with your question even if the main source isn’t attached.
This button only appears for a question, and only if another app is open. Actions use only the main source.
Attach a file from your Mac
The bar has no button to browse your folders: it finds a file by its name. Type part of the name, choose “Search my Mac”, then select the file under “On your Mac”:
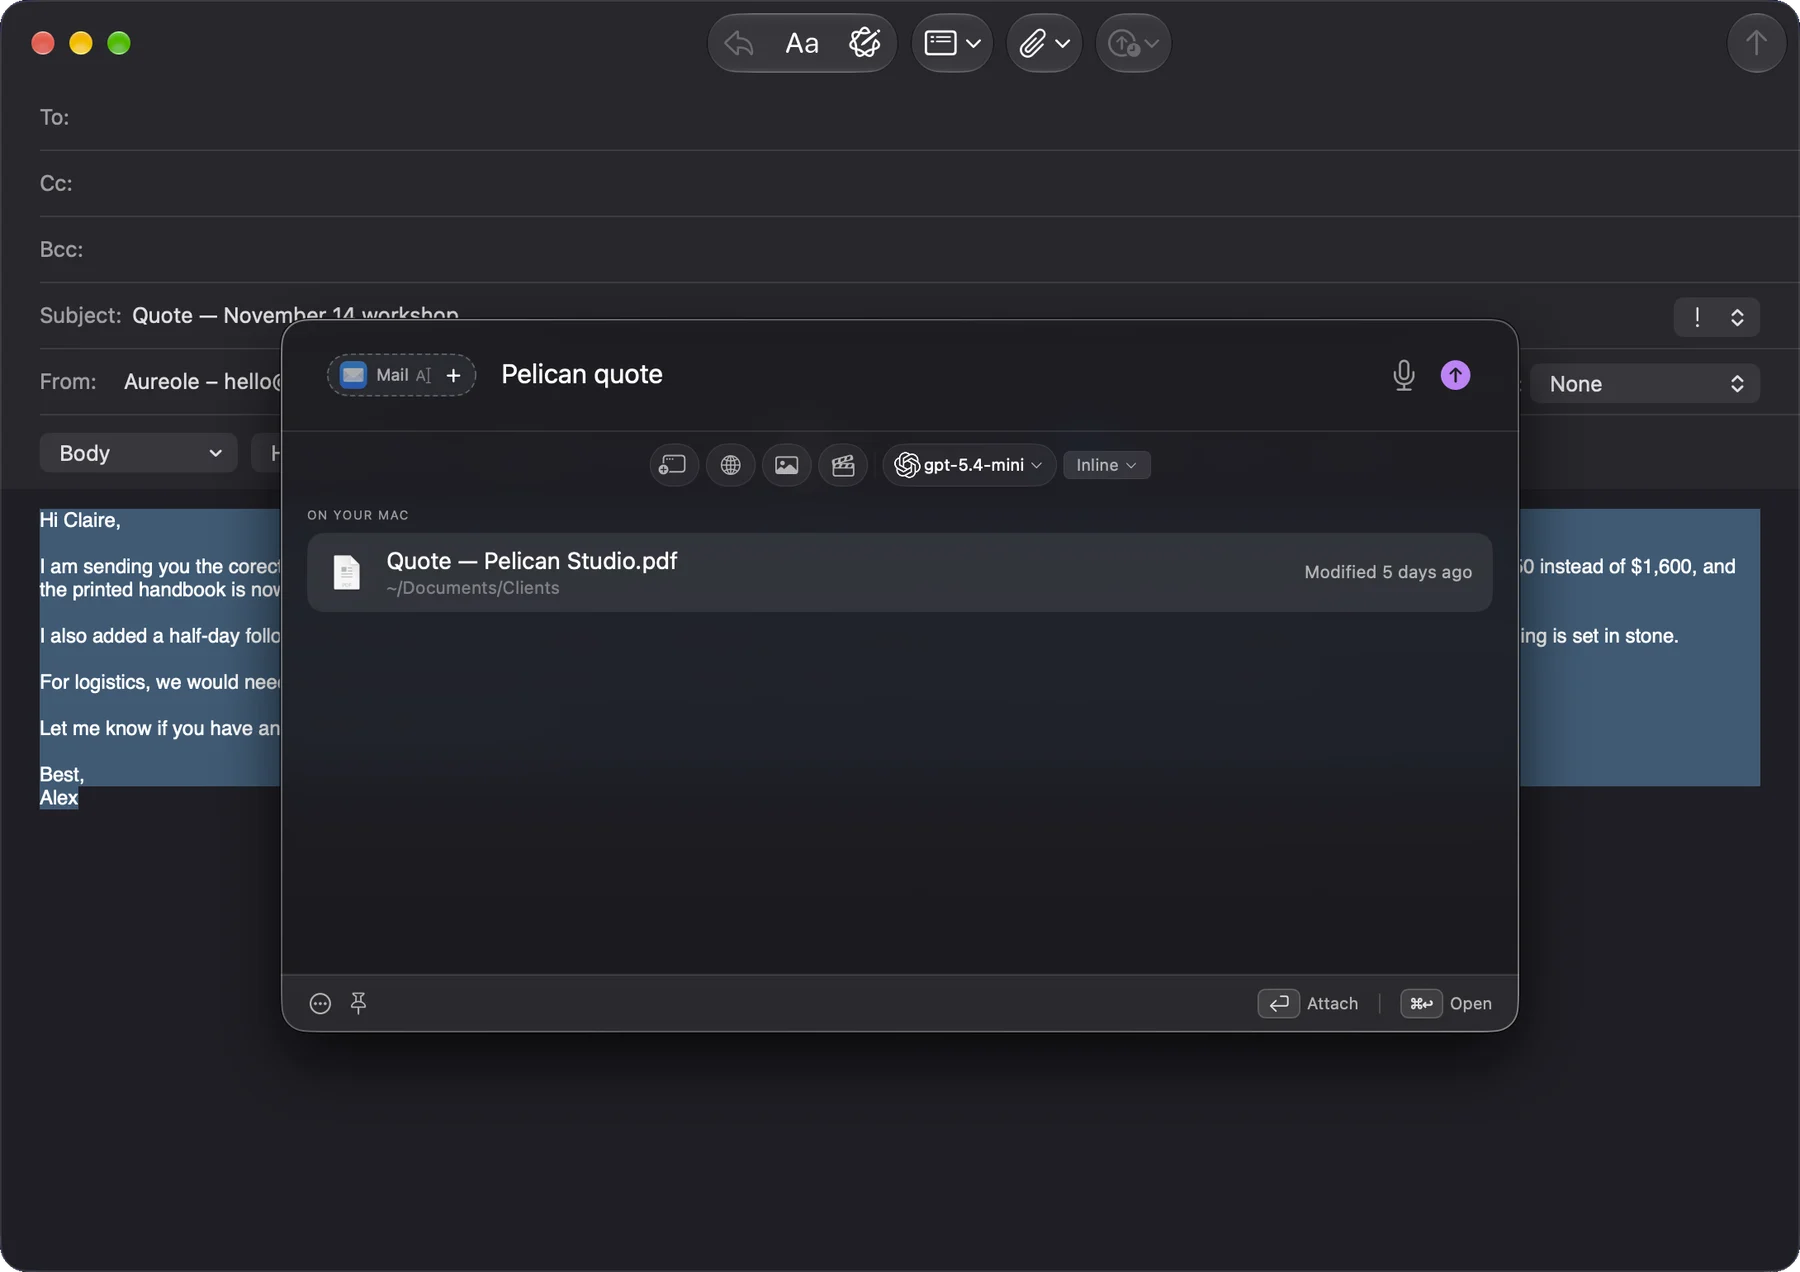
Return attaches it to your question (“Attach”), and ⌘Return opens it instead (“Open”). A folder is attached the same way: Aureole reads the files it contains, up to one hundred. A file Aureole can’t read is removed, and the bar tells you.
Files selected in the Finder are a source too: open the bar over the Finder.
What each source needs
To read a source, Aureole needs macOS’s consent:
- Accessibility, for selected text, a window’s content and the list of other windows.
- Automation, app by app, for the Finder selection, a web page in your browser and an email in Mail. macOS asks only once, the first time, and doesn’t ask again after a refusal.
- Screen Recording, only to attach a screenshot of the window.
The permissions guide shows where to grant them.
Its settings
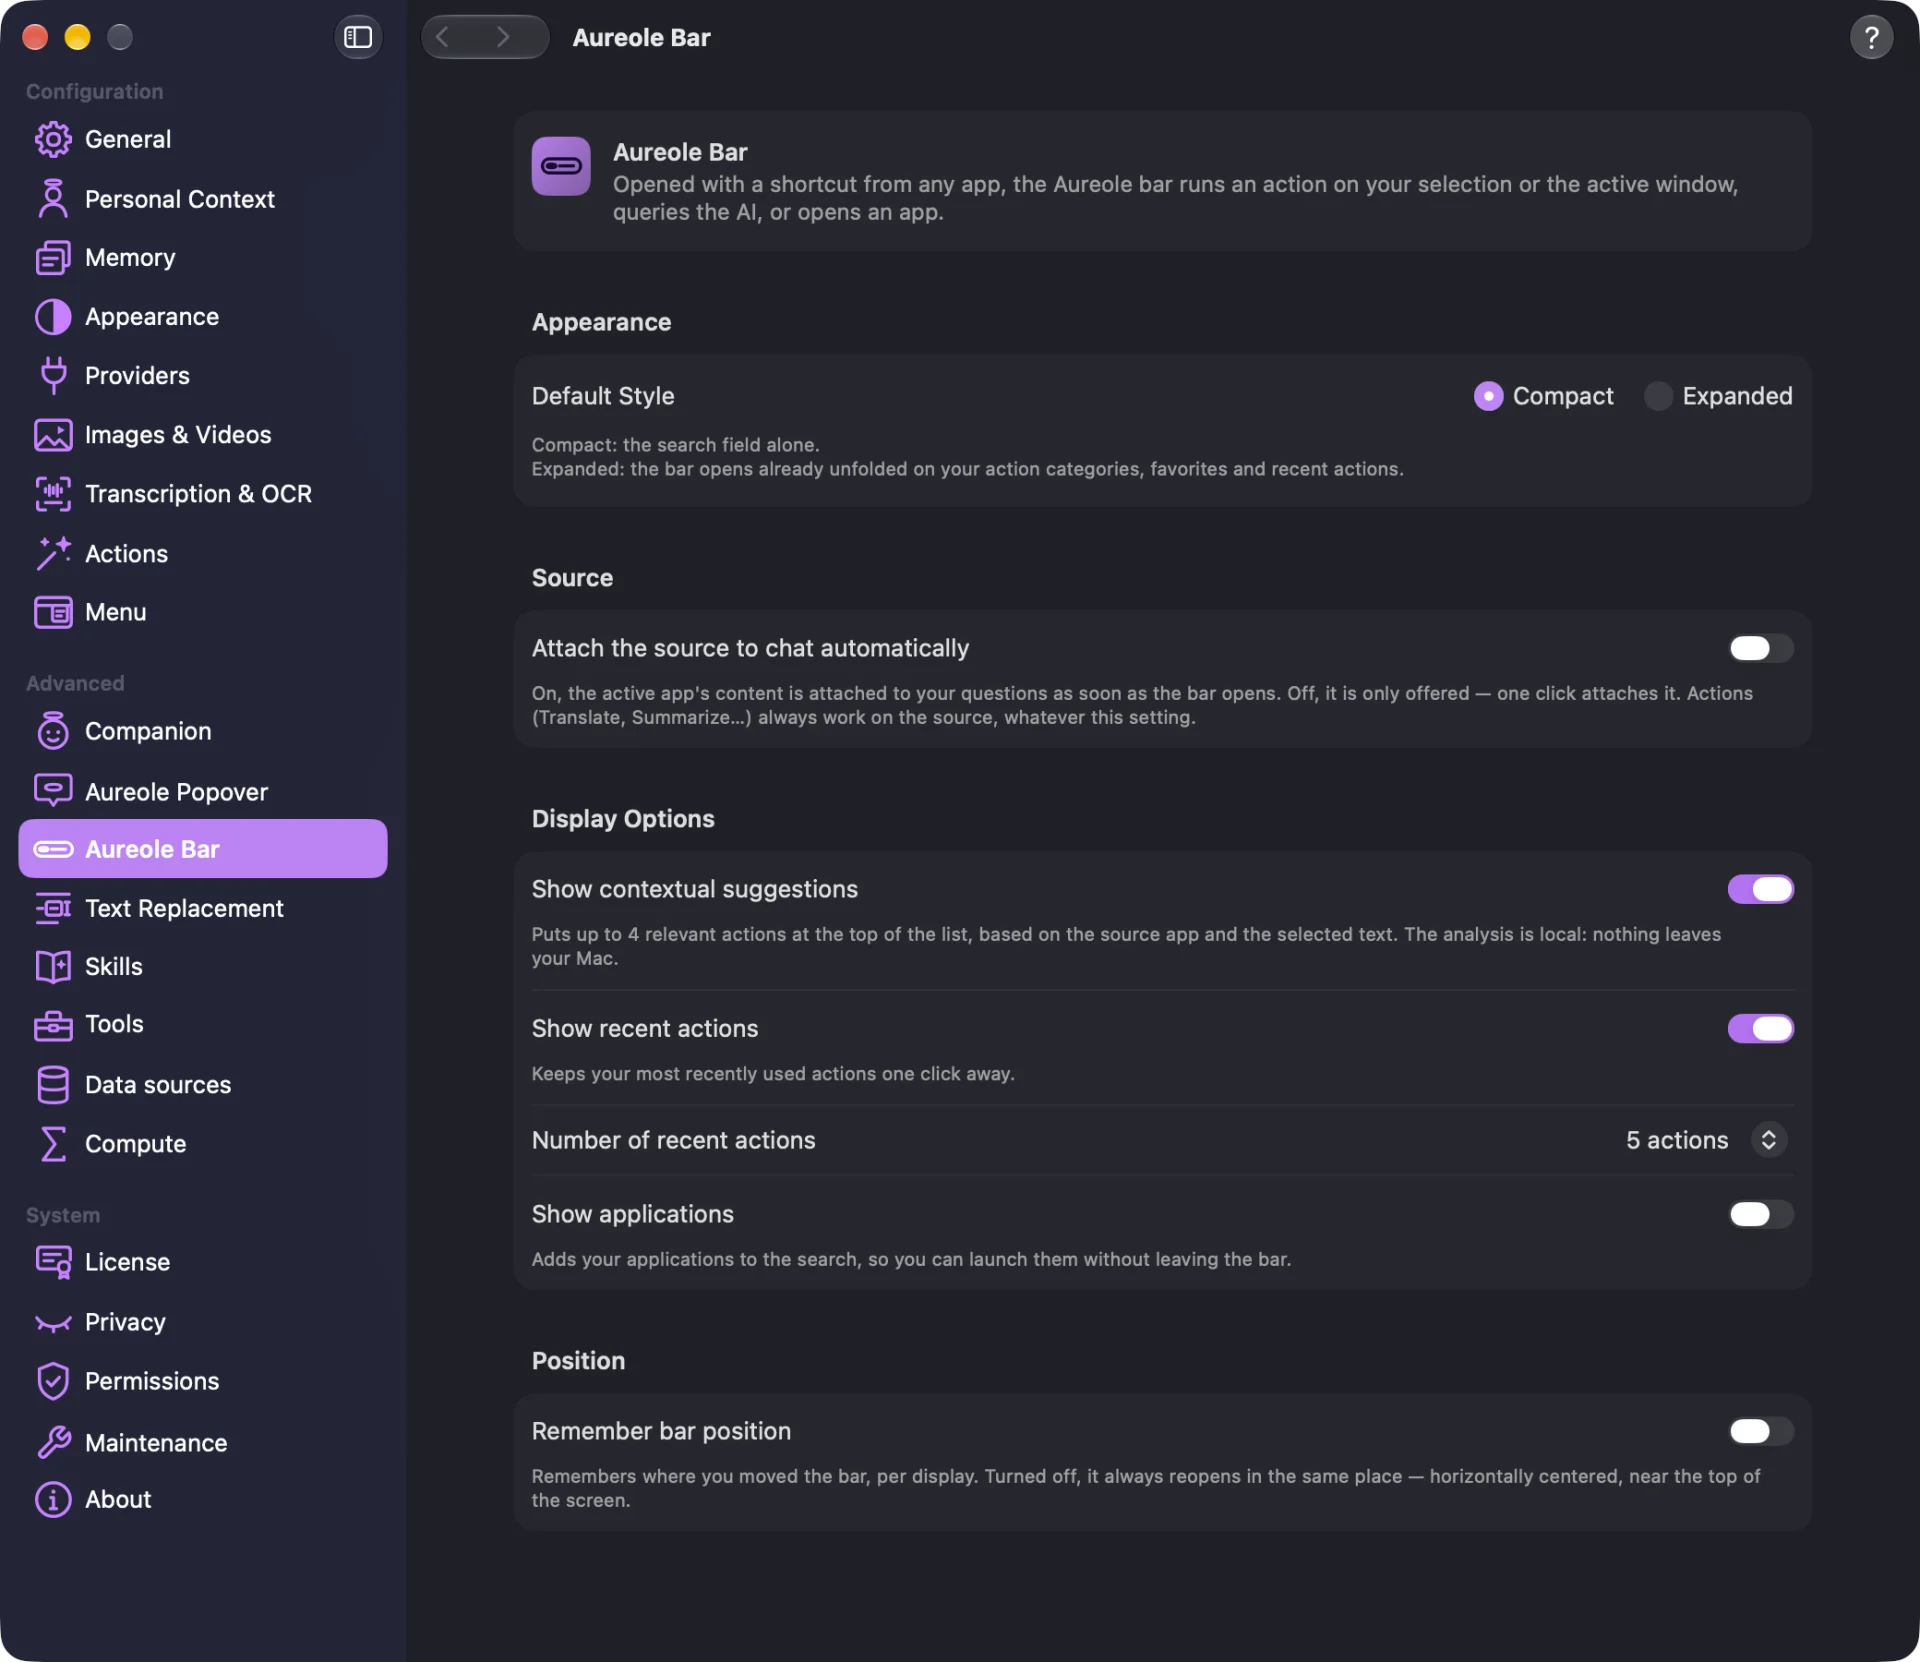
In Settings›Aureole Bar, “Attach the source to chat automatically” makes the pill solid as soon as the bar opens: your questions then always take the source into account, without you having to click. Actions don’t depend on this setting.
If you’re stuck
The AI ignored my selection
The question was sent while the pill was dotted. Click the pill before sending, or turn on “Attach the source to chat automatically” in Settings›Aureole Bar.
After the answer, the pill went back to dotted
That’s by design: after each send, the source goes back to being only offered. Click the pill again for the next question.
The pill doesn’t show my selection
Aureole doesn’t have the Accessibility permission, or the app doesn’t let its selection be read. Check the “Accessibility” row in Settings›Permissions.
In the Finder, the pill says “Finder” instead of my files’ names
Automation for the Finder was refused. Grant it in Settings›Permissions, under “Automation”.
I can’t find the button to add windows
It only appears once a question is typed (at least five characters that match no action), and only if another app is open.
The screenshot wasn’t sent
It needs the Screen Recording permission, and is only added to a web page or a window’s content. Without the permission, Aureole sends the text alone, without warning.
The web page is incomplete
Your browser doesn’t let Aureole run JavaScript in it: the page is only partly read, and a notification tells you. Or Automation for that browser was refused: see Settings›Permissions.
Something missing from this guide? Tell us.